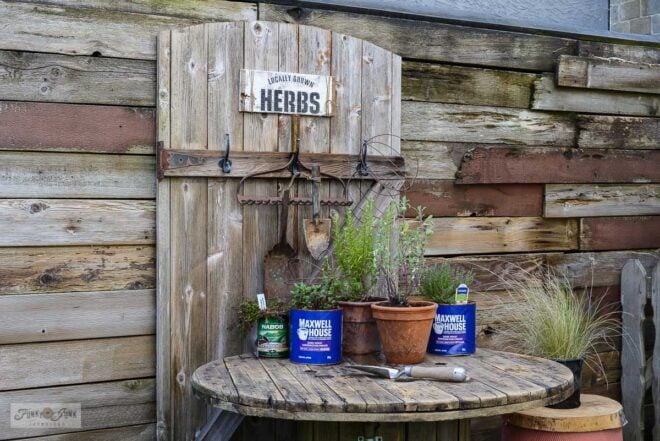
Transform a forgotten cable reel into a charming and functional herbs potting bench or outdoor table, adding rustic charm and practicality to your garden space with this easy DIY project! As a Fusion and Amazon Influencer, this post contains affiliate links in which I earn a small percentage from qualifying purchases at no extra cost […]
The post Turn an old cable reel into a herbs potting bench or outdoor table appeared first on Funky Junk Interiors.
Transform a forgotten cable reel into a charming and functional herbs potting bench or outdoor table, adding rustic charm and practicality to your garden space with this easy DIY project! As a Fusion and Amazon Influencer, this post contains affiliate links in which I earn a small percentage from qualifying purchases at no extra cost […]
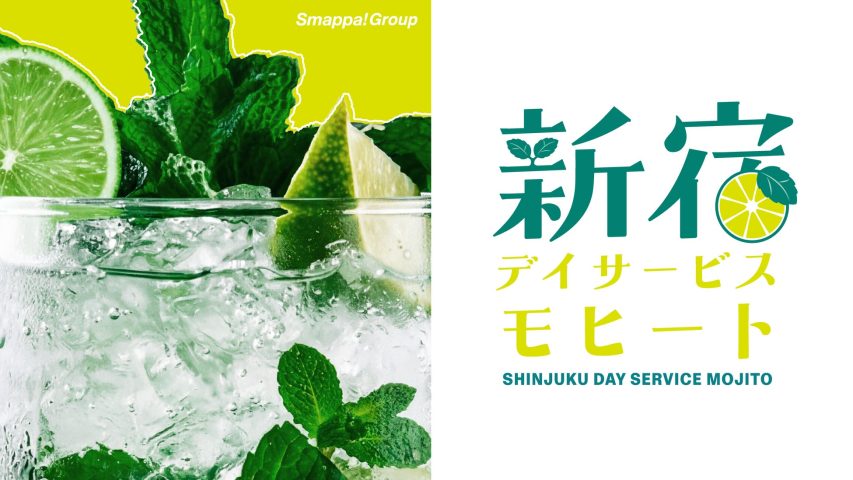
A new model of urban community collaboration in Shinjuku’s Kabukicho area connects the generations using mint as a bridge.
Senior citizens probably aren’t the first demographic that comes to mind when you think of Shinjuku’s Kabukicho neighborhood, which is much more commonly associated with younger crowds, nightlife, and bars. Yet, the area is home to a sizeable population of older folks who depend on facilities such as Shinjuku Day Service for lifestyle support and social activities.
“Day se
A new model of urban community collaboration in Shinjuku’s Kabukicho area connects the generations using mint as a bridge.
Senior citizens probably aren’t the first demographic that comes to mind when you think of Shinjuku’s Kabukicho neighborhood, which is much more commonly associated with younger crowds, nightlife, and bars. Yet, the area is home to a sizeable population of older folks who depend on facilities such as Shinjuku Day Service for lifestyle support and social activities.
“Day service” is a Japanese term that describes a place akin to a senior center where outpatient services are offered to senior citizens who are still capable of living independently but could use help with certain tasks or socialization activities. Shinjuku Day Service has recently partnered with Smappa! Group, which operates a large number of restaurants, bars, host clubs, and other entertainment facilities throughout Shinjuku, to bring a refreshingly new partnership to Kabukicho tables called the Shinjuku Day Service Mojito.
This initiative, which is one of the first of its kind in a major metropolitan area, connects farms, day service facilities, and restaurants/bars together in a community chain of compassion. Senior citizen volunteers grow mint plants organically using seedlings provided by Pipichan Farm in Ome, Tokyo Prefecture, which are then harvested and distributed to several Kabukicho restaurants, bars, and host clubs. Each of these participating locations has designed its own unique cocktail using the mint and is committed to sharing the story of its cultivation with customers.
The beauty of Shinjuku Day Service Mojito is that it creates a sense of purpose for many of the seniors so that they can feel their impact not only within their own community but in the larger Kabukicho community as well. Project organizers have commented that cultivating plants also has important physical and mental benefits for the seniors such as keeping their senses and cognitive abilities sharp. Best of all, involvement in the project is completely voluntary, participants can grow the herbs at their own pace, and they can be involved in other parts of the distribution process if they so choose.
▼ It’s fitting that mint means “virtue” or “warmth of emotions” in Japan’s language of flowers (hanakotoba).
If you’d like to support seniors by purchasing one or more of the collaborative mint cocktails, please see the list of participating businesses below. We think this is an excellent way for seniors to stay active and connected to the community–tied right up there with having their own line of collective trading cards.
Aussie~mobs posted a photo:
Written on reverse – all very disjointed and written all over the place. Please advise me if I’ve transcribed words incorrectly. Sometimes it doesn’t make sense.
29/4/1917
Dear Mary
This was taken while gardening and digging up ground for potatoes to be planted for the troops. Some old pot took it 4 each. A most remarkable thing to us happened today. Yesterday we were isolated for mumps and measles etc and today we were transferred from hut 30 to a new lot of hut
Written on reverse – all very disjointed and written all over the place. Please advise me if I’ve transcribed words incorrectly. Sometimes it doesn’t make sense.
29/4/1917
Dear Mary
This was taken while gardening and digging up ground for potatoes to be planted for the troops. Some old pot took it 4 each. A most remarkable thing to us happened today. Yesterday we were isolated for mumps and measles etc and today we were transferred from hut 30 to a new lot of huts ours is 13 the wash house is no 3.
Note Thorpe marked X, McGowan 14 stone next to me. What do you think in the name H.M.A.T. WILTSHIRE 13 words.
Tomorrow will be the start of 13 weeks since we left Brisbane. Will we have luck or not? I was put as Corporal over the Chows and was told if anyone got away I would go in the clink.
We saw a great sham? fight today at Hurdcott visitors were here and two fellows got badly hurt one lost his eye
gas, bowls, cricket anything. Pretty to see.
I was luck again left watch in bath room for 15 minutes and got it.
Watch losing again 10 minutes each day.
Love and kisses, Harold
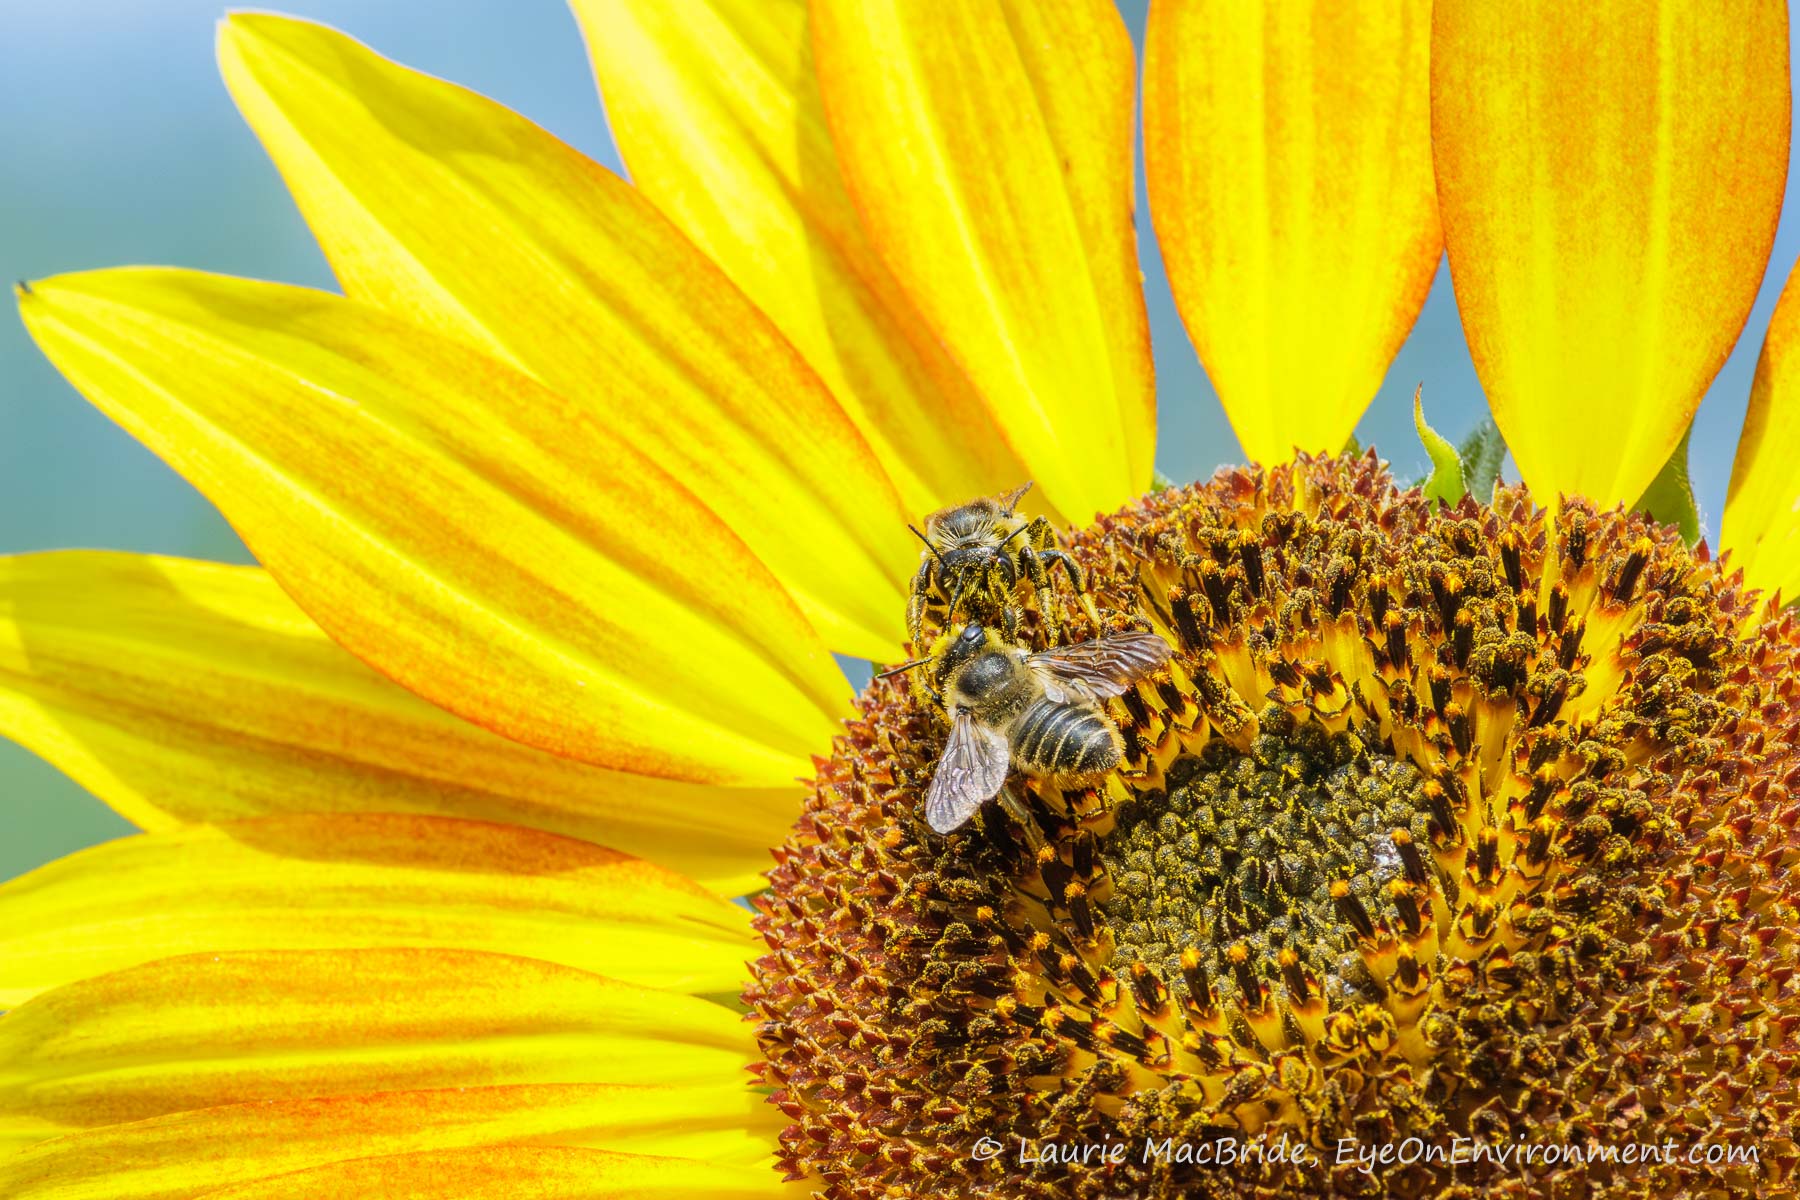
Bees have been plentiful and active in our garden all summer, though almost always moving too quickly for me to photograph. But the other day, when I had my camera conveniently in hand, I noticed that high up on the now-very tall sunflowers, bees were moving ever so slowly. I watched through my telephoto lens […]
Bees have been plentiful and active in our garden all summer, though almost always moving too quickly for me to photograph. But the other day, when I had my camera conveniently in hand, I noticed that high up on the now-very tall sunflowers, bees were moving ever so slowly. I watched through my telephoto lens […]
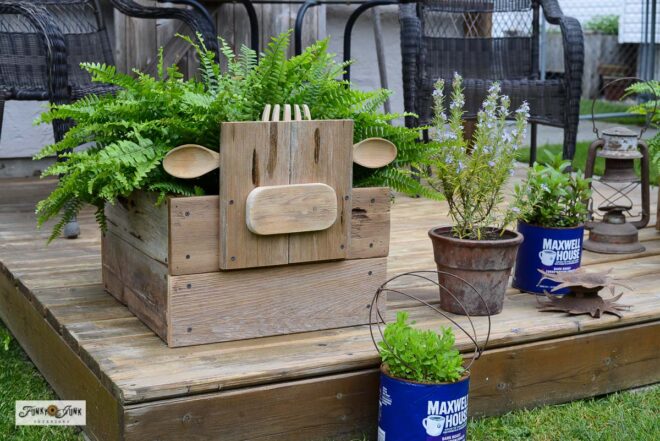
Bring a touch of farmhouse charm to your garden by building this cow-themed simple DIY planter box, featuring adorable wooden spoon ears and salad fork hair for a playful, rustic look! As a Fusion and Amazon Influencer, this post contains affiliate links in which I earn a small percentage from qualifying purchases at no extra […]
The post Cow-theme simple DIY planter box with easy wooden spoon ears appeared first on Funky Junk Interiors.
Bring a touch of farmhouse charm to your garden by building this cow-themed simple DIY planter box, featuring adorable wooden spoon ears and salad fork hair for a playful, rustic look! As a Fusion and Amazon Influencer, this post contains affiliate links in which I earn a small percentage from qualifying purchases at no extra […]
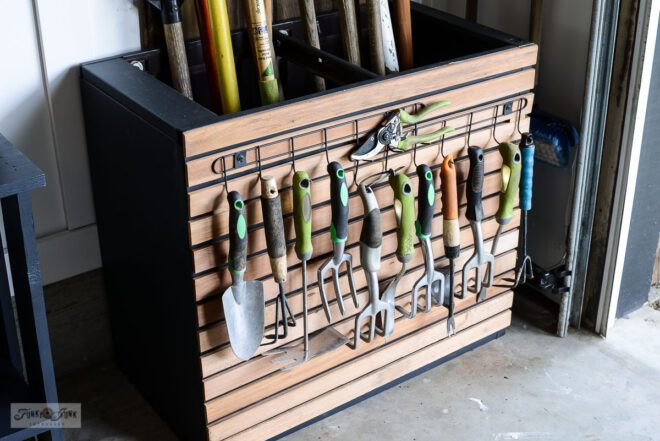
Transform an old file cabinet into clever, space-saving garden tool storage that keeps your outdoor essentials tidy and easily accessible! A creative DIY project that is affordable and useful by combining recycling with functionality for every gardening enthusiast. As a Fusion and Amazon Influencer, this post contains affiliate links in which I earn a small […]
The post Space-Saving DIY Garden Tool Storage With An Old File Cabinet appeared first on Funky Junk Interiors.
Transform an old file cabinet into clever, space-saving garden tool storage that keeps your outdoor essentials tidy and easily accessible! A creative DIY project that is affordable and useful by combining recycling with functionality for every gardening enthusiast. As a Fusion and Amazon Influencer, this post contains affiliate links in which I earn a small […]
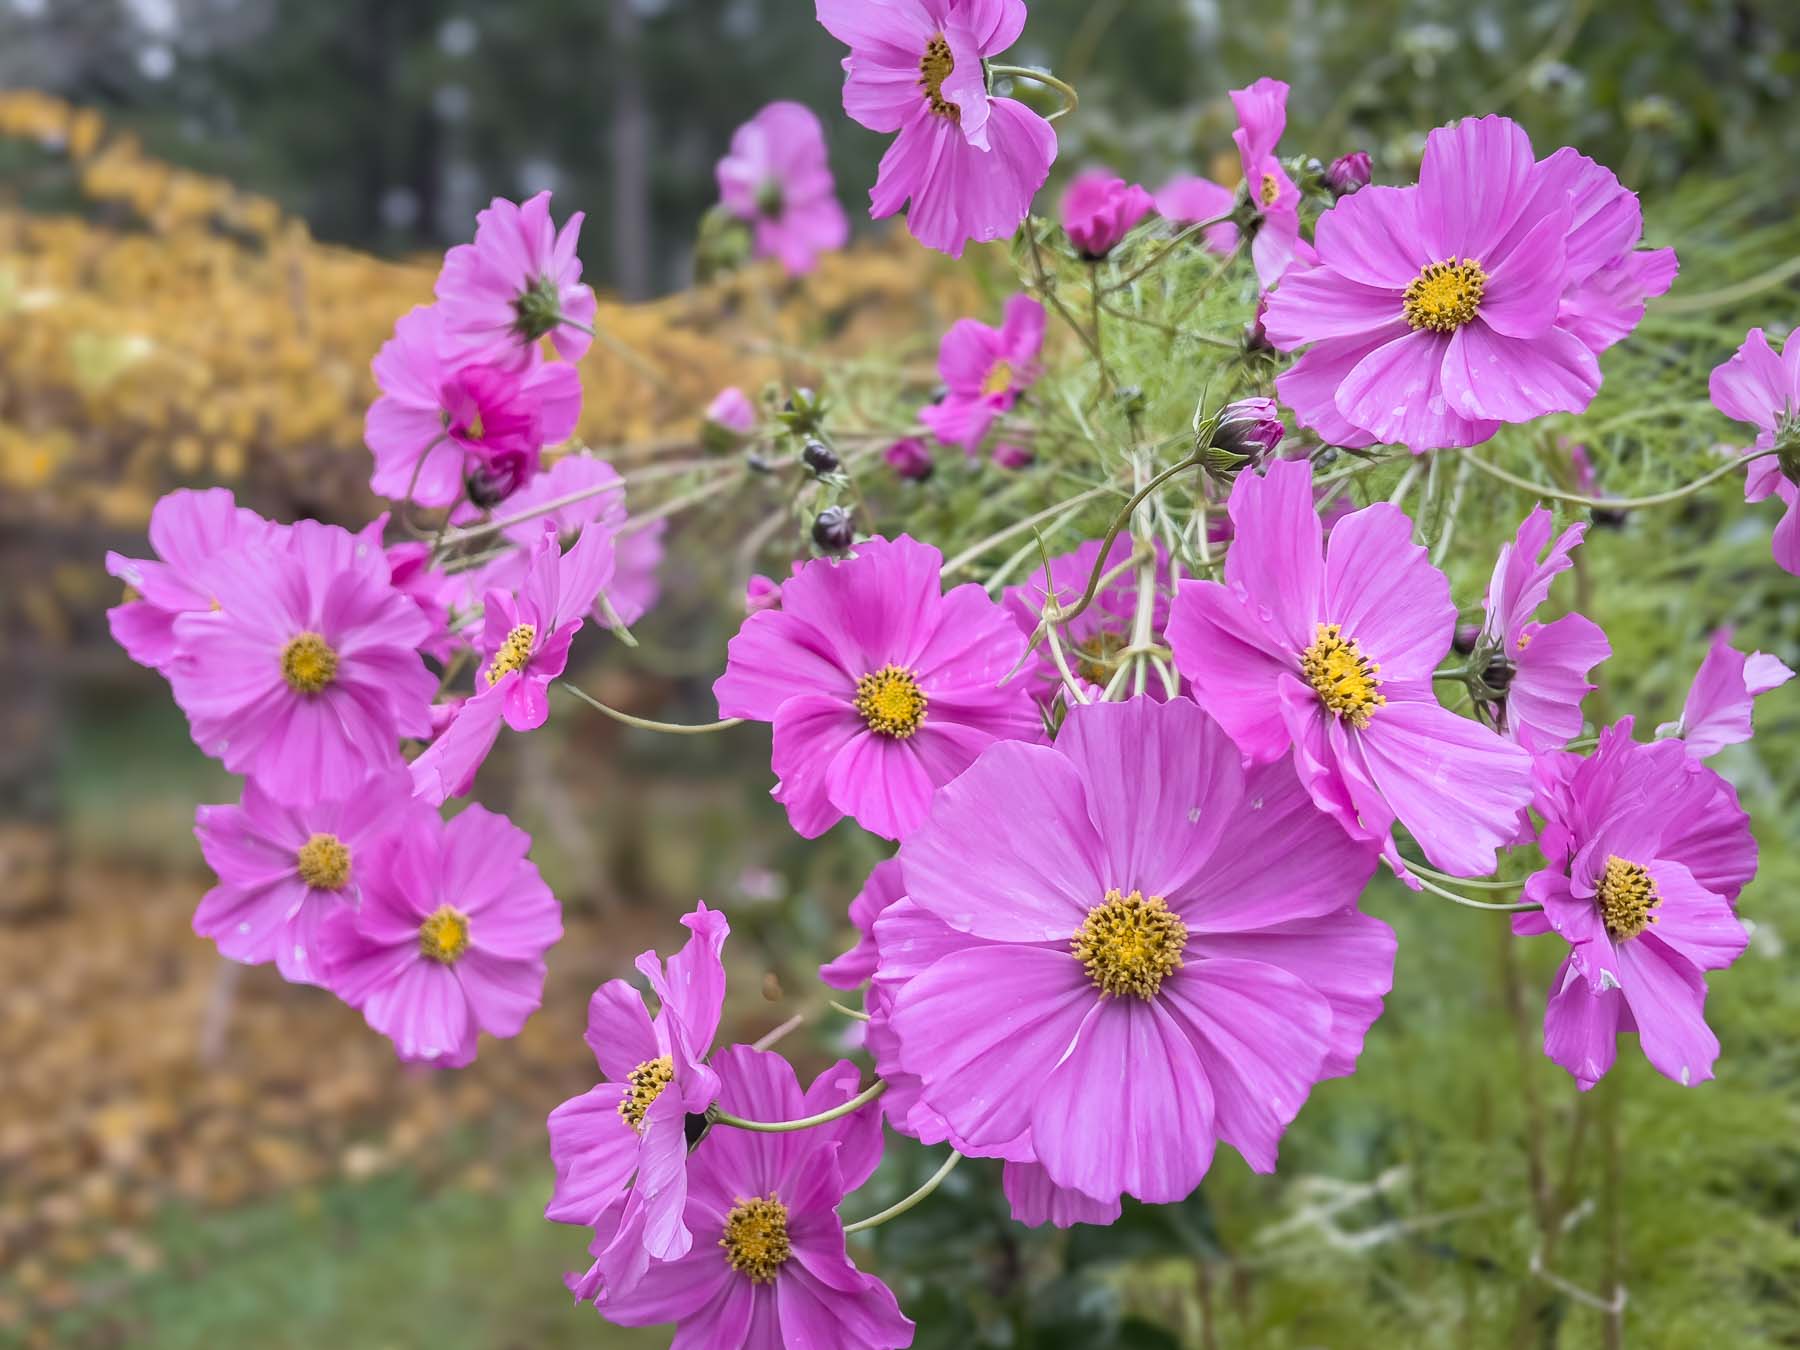
It’s just a memory now, but what a spectacular one! The plant in the photo above began life as a volunteer in our garden last spring. I wasn’t sure what it was at first and almost yanked it out, since it was growing fast and taking up precious space that could be used for food […]
It’s just a memory now, but what a spectacular one! The plant in the photo above began life as a volunteer in our garden last spring. I wasn’t sure what it was at first and almost yanked it out, since it was growing fast and taking up precious space that could be used for food […]
One gallon of water. That’s roughly how much a well-run aquaponics system uses to grow a kilogram of leafy greens. Compare that to the 30 or more gallons required by conventional soil farming, according to a 2024 comparative greenhouse study, and the benefits are inescapable.
That efficiency is why aquaponics — raising fish and growing plants in a closed-loop system — has moved from backyard novelty to subject of serious agricultural research. A 2025 review in Sustainable Environment Resea
One gallon of water. That’s roughly how much a well-run aquaponics system uses to grow a kilogram of leafy greens. Compare that to the 30 or more gallons required by conventional soil farming, according to a 2024 comparative greenhouse study, and the benefits are inescapable.
That efficiency is why aquaponics — raising fish and growing plants in a closed-loop system — has moved from backyard novelty to subject of serious agricultural research. A 2025 review in Sustainable Environment Research documents how integrating AI, IoT sensors, and automation into aquaponics can significantly enhance system efficiency, increase food production, reduce operational costs, and minimize waste. For home gardeners in 2026, the barrier to entry has never been lower. All-in-one kits start under $100, water quality testing has become more accurate and affordable, and the science behind getting both fish and plants to thrive is well-established.
Nitrification is at the heart of every aquaponics system. Fish produce ammonia-rich waste. Beneficial bacteria convert that ammonia first into nitrite, then into nitrate — a form plants can absorb directly. The plants filter the water. The cleaned water returns to the fish. Once the system cycles, the main inputs are fish food and occasional water top-offs.
This article contains affiliate links. If you purchase an item through one of these links, we receive a small commission that helps fund our Recycling Directory.
1. Invest in Reliable Equipment
The core hardware list hasn’t changed much — but what’s available at each price point has improved considerably.
Aquarium or tank. A 100-gallon tank remains the recommended starting point for a serious home system. It gives you flexibility in fish species, plant density, and system stability. Acrylic tanks are lighter and optically clearer; glass tanks are heavier but scratch-resistant. Expect to pay $300–$600 for a quality 100-gallon tank. Search current options on Amazon.
If you’re new to aquaponics, the AquaSprouts Garden Kit is a well-reviewed all-in-one beginner system that fits a standard 10-gallon aquarium. It includes a grow bed, submersible pump, mechanical timer, and light bar mounting system, and costs $75–$90. The aquarium itself is sold separately.
Canister filter. For a 100-gallon aquaponics tank, target 500–600 gallons per hour (GPH) of water turnover, well above what the tank volume alone would suggest, because the fish load demands high filtration. The Fluval FX2 (~$269 on Amazon) is consistently top-rated for tanks up to 100 gallons, featuring 4-stage filtration, Smart Pump technology that auto-adjusts flow, and a built-in water change system. A solid budget alternative is the Penn-Plax Cascade 1000 (~$199 on Amazon), which handles up to 100 gallons, recirculating the water more than twice an hour.
Air pump. Dissolved oxygen is critical for fish health and for the beneficial bacteria driving nitrification. A quality air pump — or a canister filter with an integrated spray bar — will keep oxygen levels stable. A 2025 review in Reviews in Aquaculture found that micro-nano bubble (MNB) aeration increased butterhead lettuce yield by 35% compared to conventional diffusers, and raised nitrate concentration in the water. MNB systems are commercially available but not yet mainstream for home setups, so a conventional air pump remains the practical choice for most beginners.
Grow lights (optional, system-dependent). Indoor systems need supplemental lighting. Full-spectrum LED grow lights have dropped substantially in price and energy draw. Look for LED bars with daylight-spectrum output (5000–6500K) sized to your grow bed. Search LED grow lights on Amazon.
Water heater (optional). Tilapia require 70–85°F. If your space runs cooler, a submersible aquarium heater is essential. Search aquarium heaters on Amazon.
2. Choose Your Setup
Three system types work at home scale. The choice depends on available space, target crops, and tolerance for complexity.
Media bed are recommended for beginners. Plants grow in a bed of inert media, such as expanded clay pebbles, gravel, or lava rock, positioned above or beside the fish tank. A pump floods the bed periodically, then drains back. The media supports roots and houses beneficial bacteria. Research from Texas A&M confirmed media beds are the most forgiving system for beginners and support the widest range of crops, including fruiting vegetables like tomatoes and cucumbers. The Oklahoma Cooperative Extension Service provides detailed DIY build plans.
A 2025 study found that carbonized rice husks and cocopeat as grow media can yield five times more crop than traditional expanded clay aggregate (LECA), though they decompose over time and require more frequent replacement.
Nutrient film technique (NFT). A thin stream of water flows continuously through PVC tubes past plant roots dangling inside. Excellent for herbs, lettuce, and small greens in tight or vertical spaces; the tubes can be wall-mounted. Vertical aquaponics setups can increase productivity per unit area by up to 160% compared to horizontal systems, based on research with strawberries and basil. NFT kits are available on Amazon for both DIY and complete systems.
Raft (deep water culture). Plants float on foam rafts with roots submerged directly in nutrient-rich water drawn from the fish tank. They produce a higher yield than NFT for leafy greens, but requires more robust filtration because solids aren’t removed by a media bed. More common in semi-commercial operations than small home setups. Check options on Amazon.
A growing range of IoT sensors let you track pH, dissolved oxygen, ammonia, and temperature continuously from your phone. WiFi pH/EC meters designed for hydroponic and aquaponic systems are now in the $60–$120 range. For beginners, manual weekly testing is fine. For anyone running a system unattended or scaling up, continuous monitoring significantly reduces the risk of a water quality crash.
The fish fertilize the plants and the plants clean the water for the fish in an aquaponic system. Image credit: GRACE Communications Foundation and Mother Jones, CC0, via Wikimedia Commons
3. Add the Fish
An aquaponics system will support manyspecies of fish. Several of the most popular options are:
Tilapia: The most common aquaponics fish for good reason. Tilapia tolerate temperature swings, pH variation, and elevated ammonia better than most species. They grow quickly (typical harvest: 6–8 months), are inexpensive to stock, and provide a dual harvest of vegetables and protein. Best for warm indoor or greenhouse systems (70–85°F).
Koi: Popular ornamental choice. Koi tolerate poor water quality and are hardy once established, but they’re susceptible to a range of pathogens and aren’t typically harvested for food. Well-suited to media bed systems where water quality is easier to maintain.
Bluegill, perch, and catfish. Solid edible alternatives to tilapia in cooler climates where tilapia’s warmth requirements are a challenge. Texas A&M’s fish species selection guide covers temperature ranges, feed conversion ratios, and disease susceptibility for home-scale species in detail.
These are great options, but you can also consider carp, perch, largemouth bass, bluegills, guppies, and more. Purchase fish from a reputable aquaculture supplier or local fish hatchery when possible — disease-carrying fish is one of the fastest ways to crash a new system. Pet store fish are not certified disease-free.
4. Add the Plants
Like fish, the options are endless when deciding which vegetables to grow in your aquaponics system. Some popular options include broccoli, celery, cucumbers, and basil.
But because different plants require different conditions, you’ll want to select plants that will thrive in your setup. As Go Green Aquaponics explains, it is important to consider the following:
System: What type of aquaponics system you will use – plants with no root structure do well in a raft setup, while root vegetables do well in a media bed.
The optimal temperature and pH level for your fish and your plants – the closer the match, the more successful you’ll be.
Environment: the amount of light, temperature and – if you’re setting up your system outside – rain the plants will get.
How much space you have for plants versus how much space the plants need to grow.
Plant-to-fish ratio: The more fish you plan on having, the more plants you need to absorb the nutrients.
5. Maintain Your System
Keeping healthy plants and fish will require regular maintenance. Some tips include:
Feed your fish two to three times daily in small amounts. Overfeeding is the most common cause of ammonia spikes in home systems. Uneaten food decomposes rapidly and overwhelms the beneficial bacteria that keep the system in balance.
Test pH weekly. Target range is 6.4–7.4, with most systems running best around 6.8–7.0. The API Freshwater Master Test Kit (~$35 on Amazon) tests pH, ammonia, nitrite, and nitrate in one kit — the standard recommendation for aquaponics monitoring. For more serious systems, the LaMotte Aquaponics Water Test Kit (~$85 on Amazon) covers nine parameters including dissolved oxygen and carbon dioxide, and comes with a rugged carrying case. To raise pH naturally, dissolve a tablespoon of food-grade potassium carbonate (potash) in a bucket of system water, add it slowly to the tank, and retest after 24 hours before adding more.
Test ammonia and nitrate weekly or biweekly. Ammonia should be below 2 ppm; nitrates should stay under 160 ppm. Elevated ammonia: feed less, increase aeration, or reduce fish density. High nitrates: add more plants or remove some fish.
Mind the cycling period. A new system takes 4–6 weeks to fully cycle and for the bacterial colony to establish and nitrogen conversion to stabilize. Don’t increase fish load or plant density during this period. Ammonia and nitrite readings near zero consistently is your green light.
The following video from Rob Bob’s Aquaponics provides guidance on how to check the pH, ammonia levels, and nitrate levels.
Get Some Fish In Your Garden
Aquaponics is an easy and environmentally conscious way to grow produce and raise fish at the same time. It can be used to grow all your favorite leafy greens, and there are endless varieties of fish that will adapt well to this system. Just keep up with regular maintenance and aquaponics will prove to be a viable and sustainable new way to garden.
The science of aquaponics is advancing quickly. Three developments from recent peer-reviewed literature are worth knowing about, even if most aren’t yet practical for home systems:
Algae co-cultivation.Reviews in Aquaculture reports that introducing macroalgae such as Spirogyra spp. can nearly double plant yields compared to traditional aquaponic systems. Co-cultivating microalgae (Chlorella) with plants in raft systems also controls ammonia at twice the efficacy of non-algal systems. This is emerging research — not yet mainstream for home growers — but a promising direction for anyone looking to push yields further.
Decoupled system design.Research from the Journal of the World Aquaculture Society (2024) documents that decoupled systems, which separate the aquaculture unit from the hydroponic unit, allow optimized conditions in each component, resulting in better nutrient utilization and increased productivity compared to coupled designs. Decoupled systems allow independent pH management for fish and plants, which is otherwise a constant compromise in standard coupled setups. Commercially available decoupled systems are beginning to become available; for DIY builders, it’s a worthwhile design consideration when scaling up.
AI and IoT integration. A 2025 Sustainable Environment Research review emphasizes that monitoring strategies using artificial intelligence, the Internet of Things, and renewable energy can significantly enhance aquaponic system efficiency. For home growers, this means the WiFi monitoring systems mentioned in Step 2 are part of a broader wave of automation coming to small-scale aquaponics. The good news: prices will continue to drop.
Editor’s Note: This article was originally published on March 17, 2021, and updated in April 2026. Feature image of outdoor aquaponics system courtesy of Vasch~nlwiki, CC BY-SA 4.0, via Wikimedia Commons
About the Author
David Thomas is founder and editor-in-chief of Everything Fishkeeping, a fishkeeping and aquascaping magazine. He has been keeping fish since he was a child and has kept over 12 different setups. His favorite is his freshwater tank with Tetras and Loaches.
As the spring flowers start to appear and the days get longer, the urge to dig in the dirt returns. But you don’t have to wait for warmer weather to get growing. Starting plants from seed extends your relationship with the garden, gives you more control over seed sourcing, and saves real money compared to buying nursery starts, sometimes as much as 90% per plant.
Seed starting is also a lower-waste choice. You don’t need plastic nursery pots or peat-heavy commercial growing media, and get the op
As the spring flowers start to appear and the days get longer, the urge to dig in the dirt returns. But you don’t have to wait for warmer weather to get growing. Starting plants from seed extends your relationship with the garden, gives you more control over seed sourcing, and saves real money compared to buying nursery starts, sometimes as much as 90% per plant.
Seed starting is also a lower-waste choice. You don’t need plastic nursery pots or peat-heavy commercial growing media, and get the option to select organic or open-pollinated varieties that big-box stores rarely carry. Here’s how to do it right.
This article includes affiliate links. If you buy something through these links, we earn a small commission that helps support our work.
Choose Seeds Worth Growing
Not all seeds are created equal, or equally easy. For beginners, stick to varieties with reliable indoor germination rates. Good bets include basil, broccoli, cabbage, cauliflower, chives, lettuce, melon, onion, pepper, and tomatoes.
For direct sowing outdoors, which lets you skip the indoor start entirely, beans, beets, carrots, corn, peas, spinach, squash, and zucchini all transplant poorly and are better started where they’ll grow.
The sustainability case for seed starting is strongest when you skip buying new plastic plug trays. Save nursery flats from prior seasons or raid the recycling bin for 2- to 3-inch containers such as single-serve yogurt, applesauce, or pudding cups. Wash thoroughly and punch drainage holes in the bottom.
A more advanced option is soil blocking. A soil blocker tool compresses growing medium into self-contained cubes that need no container at all. Roots hit air at the block’s edge and stop growing (a phenomenon called air pruning), which produces a denser, healthier root mass.
Don’t use garden soil or standard potting mix for seed starts; both are too dense and can introduce pathogens. You need a dedicated starter mix: light, sterile, and fine-textured enough to let tiny roots push through.
A premixed option, Old Potters’ Professional Germination Mix, offers a pH-adjusted medium made from peat moss, perlite, and vermiculite that eliminates the guesswork of blending your own starter soil. Or mix your own by combining equal parts perlite, vermiculite, and peat moss, then add 1/4 teaspoon of lime per gallon to neutralize the peat’s acidity.
Peat moss extraction raises sustainability concerns. It’s a slow-renewing carbon store. Coco coir, made from coconut processing byproduct, is a renewable alternative with similar moisture-retention properties. Plantonix’s coco coir + perlite + vermiculite bundle is worth considering if you want to skip peat entirely.
Heat Is the Underrated Variable
Most vegetable seeds germinate best between 65–85°F, and soil temperature matters more than air temperature. A spot near a heat vent can work, but that can be inconsistent. A seedling heat mat is the most reliable solution because it warms the root zone 10–20°F above ambient air temperature, which can cut germination time.
Before germination, seeds need consistent moisture, not light. Cover your flat with plastic wrap, a humidity dome, or a pane of glass to hold humidity while seeds sprout. Once you see green, remove the cover immediately: trapped humidity post-germination promotes damping-off, a fungal disease that collapses seedlings at the soil line.
Water Smart, Not Hard
Overwatering kills more seedlings than drought does. The goal is consistent moisture, which will make the soil feel like a well-wrung sponge, not a puddle. A fine-mist spray bottle is better than pouring water from above, which can displace seeds and compact the growing medium.
Grow Lights: Non-Negotiable Unless You Have a South-Facing Window
Seedlings need 12–16 hours of light per day. A sunny south-facing window might deliver 6–8 hours on a clear day. The gap produces leggy, weak starts that struggle when transplanted. Grow lights eliminate the variable entirely.
Position the bulb 2–4 inches above seedlings and use an outlet timer to automate the schedule. Full-spectrum LEDs are the current standard, as they run cooler and more efficiently than fluorescents. GROWFRIEND’s 40-cell all-in-one kit includes dual LED grow lights, a heat mat, humidity dome, and a soil moisture meter in one package.
Label Everything Because You Will Forget
This sounds obvious until you’re staring at 60 identical seedlings in March. Label every cell or flat immediately after sowing, noting the variety and the date. Reusable plant markers and a waterproof pen cost almost nothing and save considerable grief later.
Commercial seed-starting mix contains little to no fertilizer by design, as high fertility can burn delicate seedlings. But after the first true leaves appear, plants need a nutritional boost. Start with a diluted liquid fertilizer (half the label-recommended strength) and apply weekly.
Fish emulsion and kelp-based fertilizers are popular organic choices that provide a balanced nutrient profile without the risk of chemical burn from synthetic fertilizers.
Thin Ruthlessly
Sowing two or three seeds per cell is standard practice. It hedges against low germination rates. But once sprouts emerge, you need to thin to one per cell. The instinct is to leave multiples “in case.” Resist it. Crowded seedlings compete for light, water, and nutrients, and the result is weaker plants across the board.
Thin by snipping extras at soil level with small scissors rather than pulling, which can disturb roots of the seedling you’re keeping.
Pot Up Before Roots Get Crowded
Seed-starting mix has almost no nutrients. Once seedlings develop their first true leaves, which are the second set, after the initial seed leaves, they need more root space and fertility. Move them into 3- to 4-inch pots filled with a nutrient-rich potting mix.
This “potting up” step is often skipped, and seedlings suffer for it, becoming stunted, yellowed, slow to establish when finally transplanted. Pot up early rather than late.
Harden Off: Skipping This Step Is Costly
Indoor seedlings are soft. They haven’t experienced wind, direct UV, or temperature swings. Transplanting directly from a grow light to full outdoor sun causes transplant shock that can set plants back weeks or can kill them outright.
Harden off over 7–10 days: start with 2–3 hours in filtered shade on a mild day, gradually increasing sun and wind exposure. Growveg’s hardening-off guide has a clear day-by-day schedule.
Timing: Use a Planting Calendar, Not Gut Feel
The single most common beginner mistake is planting too early. Tomatoes and peppers in the ground before nights are consistently above 50°F will sulk rather than grow. Frost-tender crops started too early indoors get root-bound before it’s safe to plant them out.
The Old Farmer’s Almanac planting calendar calculates seed-starting dates based on your last frost date. Input your zip code and it generates a personalized schedule. Check the forecast in the 48 hours before any outdoor transplanting.
What You Can Do
Start with easy wins: basil, broccoli, lettuce, and tomatoes have high germination rates and forgive beginner mistakes.
Choose open-pollinated seeds: you can save and replant them each year, building independence from annual seed purchases.
Skip peat when possible: coco coir-based growing media performs similarly and avoids harvesting slow-renewing peat bogs.
Reuse containers: clean nursery flats or single-serve food containers reduce plastic demand before a single seed goes in.
Use a heat mat and grow light: these two tools account for the majority of seed-starting failures when absent.
Harden off every seedling: skipping this step costs plants; the process takes 10 days and pays off every time.
Time your starts correctly: use a frost-date-based planting calendar, not the date on the seed packet, which isn’t calibrated to your region.
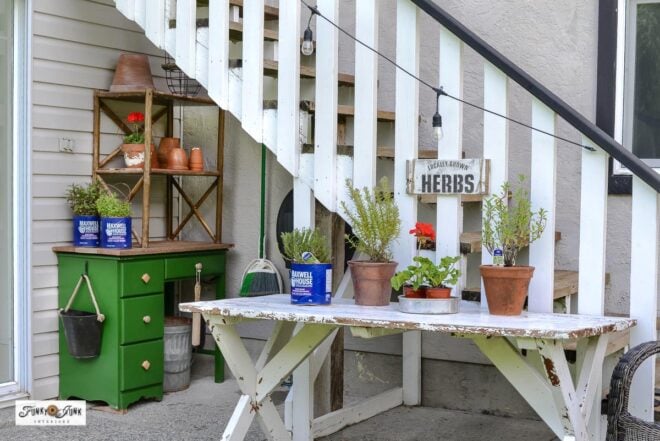
Transform a vintage desk into a charming garden station with this easy no-build DIY, giving new life to upcycled materials while creating a functional and stylish workspace for all your plant needs! As a Fusion and Amazon Influencer, this post contains affiliate links in which I earn a small percentage from qualifying purchases at no […]
The post No-build upcycled vintage desk garden station DIY appeared first on Funky Junk Interiors.
Transform a vintage desk into a charming garden station with this easy no-build DIY, giving new life to upcycled materials while creating a functional and stylish workspace for all your plant needs! As a Fusion and Amazon Influencer, this post contains affiliate links in which I earn a small percentage from qualifying purchases at no […]
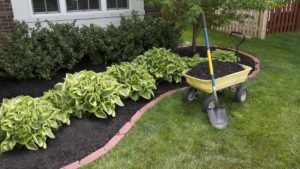
Spring is officially here, inspiring gardening plans as well as dread of lawn chores. Before you immerse yourself in another year of yard maintenance, we have a question for you: When was the last time you reevaluated your yard maintenance tactics and outdoor plant selections? An environmentally friendly approach to a low-maintenance yard can save you money, time, and effort while it benefits the local ecosystem.
By carefully selecting the right plants, including natives and perennials, you can
Spring is officially here, inspiring gardening plans as well as dread of lawn chores. Before you immerse yourself in another year of yard maintenance, we have a question for you: When was the last time you reevaluated your yard maintenance tactics and outdoor plant selections? An environmentally friendly approach to a low-maintenance yard can save you money, time, and effort while it benefits the local ecosystem.
By carefully selecting the right plants, including natives and perennials, you can minimize watering and yearly plantings — resulting in less work for you and a lower water bill. And by employing natural gardening techniques, such as composting and companion planting, you can keep your soil healthy and keep pests away — without chemicals.
Naturally, a healthy and biodiverse yard looks different depending on your climate and region. Are you familiar with the plants that are native to your region? It’s exciting to choose the optimal plants for your garden because you know you’re giving them the best chance of success — plus, you’re helping the surrounding ecosystem.
Before selecting your plants, be sure to check the noxious weed lists or your county extension office to make sure you don’t pick invasive plant species. Some low-maintenance plants may be invasive in your region. For example, English Ivy, an attractive, low-maintenance vine, is an aggressive invader and on the noxious weed of the United States list.
With careful plant selection and eco-friendly gardening strategies, you’ll enjoy a low-maintenance yard, save money, and benefit Mother Earth too! Check out the tips and plant recommendations in the following infographic from HomeAdvisor.
Editor’s Note: This article was originally published on March 31, 2021, and was updated in April 2026.


