Reading view

Slow Cooker Chicken Tortilla Soup

Do a quick prep in the morning and come home to a ready-to-eat chicken tortilla soup. At only 348 calories with 39 grams of protein and 11 grams of fiber, this soup makes a healthy leftover lunch. 

RD Tip: If you decide to pack this soup for lunch, keep the avocado and chips separate until right before you sit down to eat. Also, adding a splash of hot sauce will dial up the flavor if you enjoy a little heat.

Active Time: 5 minutes | Total Time: 8 hours + 5 minutes

Slow Cooker Chicken Tortilla Soup

Ingredients

  • 1 lb boneless, skinless chicken breast
  • 1/2 tsp salt
  • 1/4 tsp black pepper
  • 4 cups (260g) low-sodium chicken broth
  • 1 15-oz (425g) can low-sodium black beans, rinsed and drained
  • 1 15-oz (425g) jar low-sodium salsa
  • 1/2 avocado, diced, for garnish
  • 12 tortilla chips, crumbled, for garnish

Directions

Season the chicken with salt and black pepper. 

Place the chicken, broth, black beans and salsa in a slow cooker. Cook on low for 8 hours or high for 4 hours. Remove chicken and shred, then return to soup. 

Spoon soup into bowls, top with avocado and tortilla chips and serve immediately.

Serves: 4 | Serving Size: 1/4 recipe, about 2 cups

Nutrition (per serving): Calories: 348; Total Fat: 9g; Saturated Fat: 2g; Monounsaturated Fat: 3g; Polyunsaturated Fat: 2g; Cholesterol: 83mg; Sodium: 670mg; Carbohydrate: 33g; Dietary Fiber: 11g; Sugar: 4g; Protein: 39g

Nutrition Bonus: Calcium: 9%; Iron: 22%; Potassium: 1,269 mg; Vitamin A: 18%; Vitamin C: 40%

Originally published November 2017, Updated May 2026

The post Slow Cooker Chicken Tortilla Soup appeared first on MyFitnessPal Blog.

  •  

Creamy Roasted Cauliflower Soup

Creamy Roasted Cauliflower Soup

Roasting the cauliflower for this vegan soup makes it nutty and cancels out any of the brassica funk cauliflower can have when boiled. Oat milk and a russet potato make the soup thick and creamy, without adding any dairy. A stick blender, also called an immersion blender, is an inexpensive kitchen gadget that makes pureed soups a breeze to throw together, but a regular kitchen blender works, too. Pair this delicious soup with a protein source for a complete, balanced meal.

Active time: 60 minutes | Total time: 1 hour 5 minutes

Creamy Roasted Cauliflower Soup

Ingredients

  • 1 medium (588g) head of cauliflower
  • 2 tbsp olive oil, divided
  • 4 whole garlic cloves
  • ½ tsp freshly ground black pepper
  • ¼ tsp salt
  • 1 medium onion, chopped
  • 4 cups low-sodium vegetable broth
  • 1 medium (213g) russet potato, peeled and chopped
  • 1 bay leaf
  • 1 cup (244g) plain unsweetened oat or hemp milk
  • ½ tsp freshly ground nutmeg
  • 1–2 tbsp fresh lemon juice
  • 2 tbsp chopped parsley, for garnish

Directions

Preheat the oven to 400°F (204°C). Cut the cauliflower into 2-inch florets and thinly slice the center stalk. On a rimmed baking sheet, toss the cauliflower and garlic with 1 tbsp of the olive oil, plus salt and pepper. Roast until the cauliflower is deeply browned in spots, about 30 minutes.

Meanwhile, heat the remaining tbsp of oil in a soup pot over medium heat. Add the onion and cook, stirring occasionally, until translucent and beginning to brown, about 5 minutes.

Transfer the cauliflower and garlic to the pot, reserving 1/2 cup (about 40 g) of the smallest browned pieces for garnish. Add the broth, potatoes, and bay leaf. Bring to a simmer, then cover, reduce the heat to medium-low, and cook until the vegetables are very tender, about 25 minutes.

Discard the bay leaf. Add the oat milk, then puree the soup with an immersion blender directly in the pot until smooth. (Alternatively, blend in batches in a standard blender, venting the lid slightly to release steam.) Stir in the nutmeg and lemon juice. If the soup is too thick, add warm water to thin as needed.

To serve, ladle the soup into bowls and top with the reserved roasted cauliflower and parsley.

Serves: 4 | Serving Size: 2 cups

Nutrition (per serving): Calories: 174; Total Fat: 8g; Saturated Fat: 1g; Monounsaturated Fat: 5g; Polyunsaturated Fat: 1g; Cholesterol: 0mg; Sodium: 356mg; Carbohydrate: 24g; Dietary Fiber: 5g; Sugar: 5g; Protein: 5g
Nutrition Bonus: Potassium: 798mg; Iron: 7%; Vitamin C: 131%; Calcium: 15%

Originally published November 5, 2020; Updated October 2026

The post Creamy Roasted Cauliflower Soup appeared first on MyFitnessPal Blog.

  •  

Slow Cooker Banana-Nut Oatmeal

Slow Cooker Banana-Nut Oatmeal

Say hello to your new breakfast bestie: the slow cooker. Use it to make our simple slow-cooked banana-nut oatmeal by adding pantry staples like oats, milk, nut butter and honey. This satisfying breakfast will keep you full for hours.

Active time: 5 minutes | Total time: 8 hours + 5 minutes

Slow Cooker Banana-Nut Oatmeal

Ingredients

  • Cooking spray
  • 1 cup steel cut oats 
  • 3 cups water
  • 1 cup low-fat (2%) milk
  • 1/4 tsp salt
  • 2 medium bananas, sliced
  • 2 tbsp almond butter
  • 2 tbsp honey

Directions

Lightly coat a 4-quart slow cooker with cooking spray. Combine the oats, water, milk, and salt in the slow cooker. Cover and cook on low for 8 hours.

Spoon about 1 cup of oatmeal into 4 bowls. Top evenly with banana slices and drizzle with almond butter and honey.

Serves: 4 | Serving Size: 1 cup oatmeal + 1/2 banana + 1 1/2 tsp almond butter + 1 1/2 tsp honey

Nutrition (per serving): Calories: 339; Total Fat: 9g; Saturated Fat: 2g; Monounsaturated Fat: 3g; Polyunsaturated Fat: 1g; Cholesterol: 5mg; Sodium: 188mg; Carbohydrate: 55g; Dietary Fiber: 7g; Sugar: 21g; Protein: 11g

Nutrition Bonus: Potassium: 354mg; Iron: 12%; Vitamin C: 12%; Calcium: 12%

Originally published: November 21, 2017; Updated April 2026

The post Slow Cooker Banana-Nut Oatmeal appeared first on MyFitnessPal Blog.

  •  

Mushroom and Spinach Phyllo Triangles

Mushroom and Spinach Phyllo Triangles

These crispy pastry pockets are stuffed with mushrooms, spinach and feta, just like your favorite Greek restaurants. We use olive oil spray between the layers of phyllo dough instead of melted butter. They make a great do-ahead meal, so we recommend you double the recipe and freeze some for future lunches and dinners — they’re perfect when served alongside Greek salad!

Active time: 40 minutes | Total time: 1 hour, 10 minutes

Mushroom and Spinach Phyllo Triangles

Ingredients 

  • 1 tbsp olive oil
  • 1 lb (454g) cremini mushrooms, sliced
  • 1 medium onion, chopped
  • 1/2 tsp salt
  • 1/2 tsp black pepper
  • 3 medium garlic cloves, minced
  • 1 tbsp dried dill
  • 6 oz. (170g) raw baby spinach
  • 1/2 cup (75g) feta cheese, crumbled
  • 1 large egg, beaten
  • Olive oil spray
  • 12 defrosted phyllo dough sheets 
  • 1/2 cup (123g) plain nonfat Greek yogurt, for dipping

Directions

Preheat the oven to 350°F (177°C). Heat the olive oil in a large nonstick sauté pan over medium-high heat. Add the mushrooms, onion, salt, and black pepper and cook, stirring occasionally, until the vegetables are tender and the mushrooms have released their liquid, about 8 minutes. Add the garlic and dill and cook for 30 seconds, or until fragrant.

Reduce the heat to low and add the spinach, stirring after each handful, until all of the spinach is wilted, about 2 minutes. Transfer the mixture to a fine-mesh sieve or colander and press with the back of a spoon to remove excess liquid. Let cool for 5 minutes, then transfer to a large bowl. Stir in the feta cheese and egg until combined.

Carefully unroll the phyllo dough and keep it covered with a clean towel to prevent drying. Mist one sheet of phyllo with olive oil spray and place a second sheet on top. With the short side facing you, cut the stack in half lengthwise. Place 1/4 cup (58g) filling on the bottom left corner of each strip. Fold the corner diagonally to form a triangle, then continue folding upward as you would fold a flag until the entire strip is enclosed. Tuck in any loose edges and lightly mist with olive oil spray. Place on a baking sheet. Repeat with the remaining dough and filling to make 12 triangles.

Bake for about 25 minutes, or until golden brown and crisp. Serve with the Greek yogurt, if desired.

Alternatively, freeze the unbaked triangles on a baking sheet until solid, about 2 hours. Transfer to an airtight container or freezer bag and freeze for up to 3 months. Bake from frozen at 350°F (177°C) for about 30 minutes, or until golden brown and the internal temperature reaches 165°F (74°C).

Serves: 6 | Serving Size: 2 triangles, plus 2 tbsp yogurt

Nutrition (per serving): Calories: 260; Total Fat: 8g; Saturated Fat: 2g; Monounsaturated Fat: 3g; Polyunsaturated Fat: 1g; Cholesterol: 46mg; Sodium: 593mg; Carbohydrate: 38g; Dietary Fiber: 2g; Sugar: 7g; Protein: 12g

Nutrition Bonus: Vitamin D: 3%; Calcium: 14%; Iron: 17%; Potassium: 583mg; Vitamin A: 178%; Vitamin C: 20%

Originally published: October 8, 2020; Updated June 2026

The post Mushroom and Spinach Phyllo Triangles appeared first on MyFitnessPal Blog.

  •  

Crispy Chicken Tortilla Pizzas

Easy Five-Ingredient Tortilla Pizzas

Low-carb, whole-wheat tortillas create a crisp, thin-crust base for these flavorful chicken pizzas. This recipe makes two pizzas—just enough to fit on a standard sheet pan—but can easily be doubled if you’re feeding a crowd or want leftovers.

Active time: 5 minutes | Total time: 15 minutes

Crispy Chicken Tortilla Pizzas

Ingredients

  • 2 8-inch (20cm) whole-wheat, high-fiber tortillas
  • 1/2 cup (128g) low-sodium marinara sauce
  • 1/8 tsp crushed red pepper
  • 1 cup (140g) cooked chicken breast, shredded (rotisserie chicken works great here)
  • 2 cups (50g) fresh spinach, coarsely chopped
  • 2/3 cup (75g) part-skim mozzarella, grated

Directions

 Preheat the oven to 425°F (220°C). Arrange the tortillas on a sheet pan and bake until lightly browned, 2–4 minutes. Remove the pan from the oven.

Carefully flip the tortillas. Spread 1/4 cup marinara over each tortilla and sprinkle each with crushed red pepper. Top each with ½ cup shredded chicken. Arrange 1 cup spinach on each tortilla and sprinkle 1/3 cup mozzarella over each.

Bake until the cheese is melted and bubbly, about 5–7 minutes.

Serves: 2 | Serving Size: 1 pizza

Nutrition (per serving): Calories: 347; Total Fat: 19g; Saturated Fat: 8g; Monounsaturated Fat: 16g; Polyunsaturated Fat: 3g; Cholesterol: 212mg; Sodium: 768mg; Carbohydrate: 21g; Dietary Fiber: 12g; Sugar: 5g; Protein 33g
Nutrition Bonus: Potassium: 657mg; Iron: 11%; Vitamin A: 203%; Vitamin C: 17%; Calcium: 41%

Originally published June 2020; Updated May 2026

The post Crispy Chicken Tortilla Pizzas appeared first on MyFitnessPal Blog.

  •  

Butternut Squash Black Bean Chili

A bowl of hearty chili filled with black beans, tomatoes, and chunks of orange squash, served with a spoon in a white bowl resting on a beige cloth. A piece of rustic bread is placed beside the bowl on a wooden table, complementing the rich flavors perfectly. MyFitnessPal Blog

This vegetarian chili calls for hearty butternut squash and black beans, which means it’s high in fiber. One serving provides more than half of your fiber quota for the day and has 18 grams of plant-based protein (1).

Active time: 10 minutes | Total time: 45 minutes

Butternut Squash Black Bean Chili

Ingredients

  • 1 tbsp olive oil
  • 1 red onion, diced
  • 2 tbsp chili powder
  • 1 tsp ground cumin
  • 1 tsp smoked paprika
  • 1 15-oz. can no salt added diced tomatoes
  • 1 15-oz. can crushed tomatoes
  • 2 15-oz. cans reduced sodium black beans, rinsed and drained
  • 2 cups (280g) butternut squash, peeled and diced
  • 1/2 tsp salt

Directions

Heat the oil in a large stockpot over medium heat. Add the onion and cook, stirring occasionally, until softened and translucent, about 4–5 minutes.

Add the chili powder, cumin, and smoked paprika and cook, stirring constantly, for 30–60 seconds until fragrant.

Stir in the diced tomatoes, crushed tomatoes, black beans, and butternut squash. Season with salt.

Bring the chili to a gentle simmer. Reduce heat to medium-low and cook uncovered, stirring occasionally, until the butternut squash is tender, about 25–35 minutes. Add 1/2 cup water, if needed, to loosen the chili. 

Serve immediately.

Serves: 4 | Serving Size: About 2 cups

Nutrition (per serving): Calories: 338; Total Fat: 5g; Saturated Fat: 1g; Monounsaturated Fat: 3g; Polyunsaturated Fat: 1g; Cholesterol: 0mg; Sodium: 765mg; Carbohydrate: 59g; Dietary Fiber: 15g; Sugar: 11g; Protein: 18g

Nutrition Bonus: Calcium: 12%; Iron: 29%; Potassium: 1814mg; Vitamin A: 43%; Vitamin C: 14%

Originally published November 2017; updated May 2026

The post Butternut Squash Black Bean Chili appeared first on MyFitnessPal Blog.

  •  

Pressure Cooker Greek Chicken

Instant Pot Greek Chicken

This juicy, fall-off-the-bone healthy Instant Pot Greek chicken tastes like it has been roasting in the oven for hours when really it comes together in about an hour thanks to an electric pressure cooker. A delicious mix of fresh herbs, lemon zest and garlic is tucked into the skin to flavor the meat while the juices mingle with olives and capers to make a bright-tasting pan sauce.

Pro tip: A gravy separator is an inexpensive tool that makes skimming the fat off of soups and sauces like this one a snap.

RD Tip

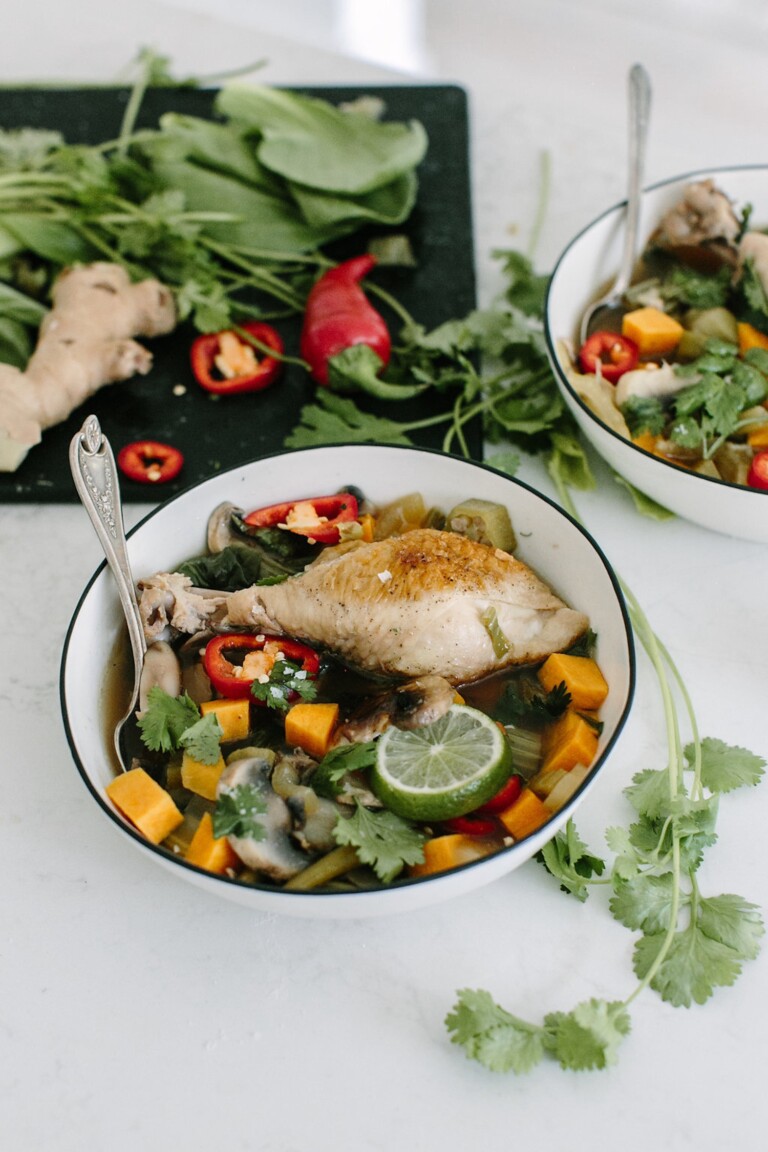
To reduce the calories and saturated fat in this recipe, remove the skin before cooking. Serve with a high-fiber grain, like farro or quinoa, and a side of steamed veggies.

Active time: 20 minutes | Total time: 1 hour, 5 minutes

Pressure Cooker Greek Chicken

Ingredients

  • 1 medium lemon
  • 1 (6-inch/15cm) fresh rosemary sprig
  • 1 (6-inch/15cm) fresh oregano sprig
  • 2 medium garlic cloves
  • 1 tsp black pepper
  • 1/2 tsp salt
  • 1 (4-lb/1.8kg) whole chicken, giblets and neck removed from cavity, if present
  • Cooking spray
  • 1 tbsp olive oil
  • 1/2 medium yellow onion, sliced
  • 1/4 cup pitted Castelvetrano olives, smashed
  • 1 tbsp vinegar-packed capers, rinsed and drained

Directions

Zest the lemon onto a cutting board. Cut the lemon in half and juice it into a measuring cup. Add enough water to make 1/2 cup (118ml) and set aside. Pull the rosemary and oregano leaves off the woody stems and discard the stems. Mound the herbs and garlic on top of the lemon zest and chop everything together until the mixture forms a coarse paste. Transfer the mixture to a small bowl, add the pepper and salt, and stir to combine.

Carefully slide your fingers under the skin of the chicken covering the breast, thighs, and drumsticks. Stuff the lemon zest-herb mixture under the chicken skin, spreading evenly. Tuck the wing tips under the chicken. Remove and discard the yellow fat inside the chicken cavity. Stuff the spent lemon halves into the cavity and tie the ends of the drumsticks together with kitchen string. Spray a trivet with handles with cooking spray and place the chicken breast-side up on the trivet. Set aside.

Put the olive oil in the Instant Pot and adjust to high heat. Add the onion and cook, stirring frequently, until tender and beginning to brown, about 4 minutes. Press Cancel. Add the lemon juice-water mixture and scrape up any browned bits from the bottom of the pot. Add the olives and capers and stir to combine. Place the chicken on the trivet in the pot. Lock the lid and make sure the pressure valve is sealed. Select Pressure Cook, adjust to high pressure, and cook for 24 minutes.

When the cooking program ends, allow the pressure to release naturally for 15 minutes. Release any remaining pressure. Wearing oven mitts, lift the chicken on the trivet out of the pot and place it on a rimmed baking sheet. Using an instant-read thermometer, check that the chicken has reached an internal temperature of 165°F (74°C) in the thickest part of the thigh, avoiding the bone. 

Use a slotted spoon to transfer the onion, capers, and olives to a small gravy boat. Set aside. Pour the cooking liquid into a gravy separator. If you do not have a gravy separator, pour the sauce into a large glass measuring cup and spoon off the fat floating on top.

Pour the defatted sauce back into the Instant Pot and add the onion-olive mixture. Select Saute and adjust to medium heat. Simmer uncovered while finishing the chicken.

Set the broiler to high and adjust an oven rack to the upper third of the oven. Broil the chicken, rotating the baking sheet once, until golden brown, about 3 minutes. Remove from the oven. Carve the chicken and serve with the sauce.

Serves: 8 | Serving Size: 1/6 of the chicken (131g), 1/4 cup (59ml) sauce

Nutrition (per serving): Calories: 531; Total Fat: 38g; Saturated Fat: 10g; Monounsaturated Fat: 1g; Polyunsaturated Fat: 0g; Cholesterol: 200mg; Sodium: 410mg; Carbohydrate: 4g; Dietary Fiber: 2g; Sugar: 1g; Protein: 43g

Nutrition Bonus: Calcium: 5%; Iron: 21%; Potassium: 91mg; Vitamin A: 35%; Vitamin C: 19%

Originally published July 2021; Updated May 2026

The post Pressure Cooker Greek Chicken appeared first on MyFitnessPal Blog.

  •  

Kale Egg-White Quiche With Sweet Potato Crust

Kale Egg-White Quiche With Sweet Potato Crust

Quiche is divine, but the crust can be time consuming and high in saturated fat. In this recipe we skip the pastry crust and use sliced sweet potatoes to line the pie pan for a slightly sweet, tender vessel for the savory egg and kale filling.

The sweet potato crust adds some fiber and vitamin A while putting a fun twist on traditional quiche (1).

Active time: 25 minutes | Total time: 1 hour 15 minutes

Kale Egg-White Quiche With Sweet Potato Crust

Ingredients

  • Cooking spray
  • 1 5-inch (13cm) sweet potato, sliced into 1/8 inch thick rounds
  • 2 tsp olive oil
  • 1 yellow onion, chopped
  • 1 tbsp fresh thyme, chopped
  • 4 cups (84g) kale, roughly chopped
  • 8 large egg whites
  • 2 large eggs
  • 1/4 cup (20g) shredded Parmesan cheese
  • 1/2 tsp freshly ground black pepper
  • 6 tsp chipotle pepper sauce, or preferred hot sauce, to taste

Directions

Preheat the oven to 375ºF (190ºC).

Spray a 9-inch, deep-dish pie pan with cooking spray, then place a single layer of sliced sweet potatoes in the pan, lining it as well as you can. There will be overlaps and gaps.

Place a square of foil on top of the sweet potato and press it on the surface of the slices, wrapping the foil around the rim of the pan. Bake for 20 minutes, until the slices are tender when pierced with a paring knife. Gently press down any slices that are not lying flat, then remove the foil. Let cool on a rack.

In a large sauté pan, drizzle the olive oil and place over medium-high heat.

Add the onion and thyme and stir, and reduce the heat when it starts to sizzle. Cook for about 5 minutes, until the onion is softened. 

Add the kale and stir for 4–5 minutes, until the kale is softened and shrunken. Let cool.

In a medium bowl, whisk the egg whites and eggs, and when well-mixed, whisk in the Parmesan and pepper.

Add the cooled kale, folding the mixture together with a spatula. Scrape into the sweet potato crust and smooth the top.

Bake for about 35 minutes, until a paring knife inserted in the center of the quiche comes out dry. The quiche should be just set with a slight wobble at the center. Let cool on a rack for 5 minutes before cutting into four wedges. Serve with hot sauce, optional.

Serves: 4 | Serving Size: 1/4 quiche

Nutrition (per serving): Calories: 168; Total Fat: 7g; Saturated Fat: 2g; Monounsaturated Fat: 3g; Polyunsaturated Fat: 1g; Cholesterol: 108mg; Sodium: 335mg; Carbohydrate: 13g; Dietary Fiber: 3g; Sugar: 4g; Protein: 14g

Originally published June 30, 2020; Updated January 2026

The post Kale Egg-White Quiche With Sweet Potato Crust appeared first on MyFitnessPal Blog.

  •  

Pressure Cooker Beer Braised Beef Brisket

A plate with sliced pot roast brisket, surrounded by cooked carrots and onions, garnished with herbs. The plate is on a white surface with a blue kitchen towel beside it. A fork and knife lie next to the plate, with a glass of water and a bottle in the background. MyFitnessPal Blog

This brisket recipe uses an Instant Pot to make a fork-tender roast with minimal fuss. The braising liquid of beer, smoked paprika and smoky chipotle peppers gives the dish a zesty, Southwestern flavor. Serve with mashed sweet potatoes and an avocado salad. You’ll have extra sauce; save it to use later as a base for the best chili ever.

Active time: 20 minutes | Total time: 2 hours, 15 minutes

Pressure Cooker Beer Braised Beef Brisket

Ingredients

  • 3 lb (1,362g) flat-cut beef brisket, fat trimmed to 1/8-in (0.32cm)
  • 1 1/2 tsp smoked paprika
  • 1 1/2 tsp salt
  • 1/2 tsp black pepper
  • 1 tbsp olive oil
  • 1 cup (240g) dark ale
  • 1 cup (240g) low-sodium beef broth, divided
  • 1 large yellow onion, thickly sliced
  • 1 tbsp chopped fresh rosemary
  • 1 tbsp chopped and canned chipotle peppers
  • 4 large carrots, peeled
  • 1 tbsp all-purpose flour
  • 1 tbsp honey

Directions

Rub the brisket all over with the paprika, salt, and pepper. Heat the oil in an electric Instant Pot on the sauté function over medium heat until hot. Add the brisket and cook until browned, about 3 minutes per side. Remove from the pot. Add the beer and simmer, scraping up the browned bits from the bottom of the pot. Press cancel.

Add 3/4 cup of the broth, onion, rosemary, and chipotle peppers to the pot. Return the brisket to the pot and place the whole carrots on top of the roast. Lock the lid, select high pressure, and set for 1 1/2 hours. Let the pressure naturally release, about 30 minutes, to ensure the roast is tender and easy to slice.

Carefully transfer the carrots and brisket to a platter and cover with foil. Select the sauté function, adjust the heat to high, and bring the sauce to a simmer. Skim off any clear liquid fat that collects on the surface and discard.

Place the flour in a small bowl. Gradually whisk the remaining 1/4 cup (60g) broth into the flour until smooth. Add the flour mixture and honey to the sauce and simmer until thickened, about 5 minutes. Thinly slice the brisket against the grain and cut the carrots into bite-sized pieces. Serve with 1/4 cup (60ml) sauce per serving. Reserve the remaining sauce for another use.

Serves: 6 | Serving Size: 4 oz. sliced meat, 1/2 cup carrots, 1/4 cup sauce

Nutrition (per serving): Calories: 440; Total Fat: 19g; Saturated Fat: 6g; Monounsaturated Fat: 10g; Polyunsaturated Fat: 1g; Cholesterol: 141mg; Sodium: 885mg; Carbohydrate: 13g; Dietary Fiber: 2g; Sugar: 6g; Protein: 49g

Nutrition Bonus: Iron: 26%; Potassium: 986mg; Vitamin A: 556%; Vitamin C: 8%

Originally published date: February 2, 2019; Updated date: May 2026

The post Pressure Cooker Beer Braised Beef Brisket appeared first on MyFitnessPal Blog.

  •  

Slow Cooker Chicken & Wild Rice Stew

Slow Cooker Chicken & Wild Rice Soup

This hearty, stick-to-your-ribs stew features tender wild rice and buttery-soft chicken. The poultry slowly simmers on the bone, lending more flavor to the soup and moisture to the meat. 

RD Tip: For efficiency, chop the veggies the night before, and put everything in the slow cooker in the morning so it cooks all day while you go about your day. Just a little advance planning makes it possible to be busy and still balance a healthy lifestyle.

Active time: 20 minutes | Total time: 7 hours, 30 minutes

Slow Cooker Chicken & Wild Rice Stew

Ingredients

  • 6 cups (1440g) unsalted chicken stock
  • 2 cups (320g) onion, chopped
  • 1 1/2 cups (190g) carrots, chopped
  • 1 cup (100g) celery, chopped
  • 1 1/4 cups (200g) uncooked wild rice
  • 1 ½ tsp salt
  • 1 tsp ground black pepper
  • 8 oz (227g) white mushrooms, sliced
  • 3 garlic cloves, minced
  • 2 lbs (907g) skinless, bone-in skinless chicken breasts
  • 5 thyme sprigs
  • 2 bay leaves
  • 3 cups (732g) 2% reduced-fat milk
  • 1/2 cup (63g) all-purpose flour
  • 3 tbsp chopped fresh parsley (optional garnish)

Directions

In a 6-quart slow cooker, stir together chicken stock, onion, carrots, celery, wild rice, salt, pepper, mushrooms and garlic. Nestle in the chicken, thyme and bay leaves. Cover and cook on low until chicken and wild rice are tender, about 7 hours (or on high for 3-4 hours).

Remove chicken from the slow cooker. Increase heat to high. Discard chicken bones and shred meat; set aside. Discard thyme sprigs and bay leaves.

In a medium bowl, whisk milk and flour until completely smooth, then slowly stir into the soup to prevent lumps.

Cook on high until thickened, about 10-20 minutes. Gently stir in chicken. Serve in bowls and garnish with parsley, if desired.

Serves: 8 | Serving Size: About 1 ⅔  cups

Nutrition (per serving): Calories: 393; Total Fat: 6g; Saturated Fat: 2g; Monounsaturated Fat: 2g; Polyunsaturated Fat: 1g ; Cholesterol: 85mg; Sodium: 421mg; Carbohydrate: 43g; Dietary Fiber: 5g; Sugar: 9g; Protein: 42g

Nutrition Bonus: Potassium: 519mg; Iron: 7%; Vitamin A: 16%; Vitamin C: 13%; Calcium: 15%

Originally published February 4, 2020; Updated April 2026

The post Slow Cooker Chicken & Wild Rice Stew appeared first on MyFitnessPal Blog.

  •  

Sheet Pan Miso Salmon With Baby Bok Choy

Sheet Pan Miso Salmon With Baby Bok Choy

Omega-3-rich salmon gets a creamy miso topping with crunchy panko bread crumbs in this easy one-pan meal. Radishes and baby bok choy cook in the same amount of time and are a unique combo, just when you were getting tired of the usual sheet pan veggies!

RD Tip

This is a great option for a quick, low-maintenance dinner, and it’s packed with anti-inflammatory properties from the salmon (1).

 Active time: 10 minutes | Total time: 25 minutes

Sheet Pan Miso Salmon With Baby Bok Choy

Ingredients

  • Cooking spray
  • 4 (5-oz./142g) salmon fillets, skin-on
  • 3 tbsp mayonnaise
  • 1 tbsp white miso paste
  • 1 tsp lemon zest, finely grated
  • 1 tsp lemon juice
  • 1/2 cup (42g) whole-wheat panko crumbs
  • 4 small baby bok choy, halved lengthwise (quartered if larger)
  • 1 tbsp olive oil
  • 1/2 tsp salt
  • 1/4 tsp black pepper

Directions

Preheat the oven to 450°F (232°C). Line a rimmed baking sheet with foil and coat generously with cooking spray. Using tweezers or needle-nose pliers, remove any pin bones from the salmon fillets. Arrange the fillets skin-side down in the center of the prepared baking sheet.

In a small bowl, stir together the mayonnaise, miso paste, lemon zest, and lemon juice until smooth. Spread the mixture evenly over the top of each fillet, then gently press the panko crumbs onto the surface so they adhere.

In a medium bowl, toss the bok choy with the oil until evenly coated. Scatter the vegetables around the salmon and season with the salt and pepper. Roast, rotating the pan once halfway through, until the salmon is cooked through to an internal temperature of 145°F, about 12–15 minutes.

To serve, slide a spatula gently between the flesh and skin of each fillet — the skin should release easily from the foil. Transfer to plates, discarding the skin, and serve immediately.

Serves: 4 | Serving Size: 1 salmon fillet, 2 bok choy halves

Nutrition (per serving): Calories: 445; Total Fat: 31g; Saturated Fat: 6g; Monounsaturated Fat: 10g; Polyunsaturated Fat: 11g; Cholesterol: 82mg; Sodium: 569mg; Carbohydrate: 10g; Dietary Fiber: 2g; Sugar: 3g; Protein: 32g

Nutrition Bonus: Vitamin D: 156%; Calcium: 11%; Iron: 9%; Potassium: 908mg; Vitamin A: 94%; Vitamin C: 56%

The post Sheet Pan Miso Salmon With Baby Bok Choy appeared first on MyFitnessPal Blog.

  •  

15 Spring Soup Recipes That Feel Light, Fresh, and Cozy

Pea gazpacho spring soup recipes

Spring always brings the urge for a reset—lighter meals, fresh produce, and recipes that feel vibrant after a winter of cozy comfort food. And while soup may feel like a cold-weather staple, the right spring soup recipes can be just as refreshing as they are nourishing.

Think vibrant greens, bright herbs, citrusy broths, and vegetable-packed bowls that celebrate the best ingredients of the season. Whether you’re craving something creamy, brothy, or protein-packed, these spring soup recipes strike the perfect balance between comforting and light—ideal for weeknight dinners or meal prep for the days ahead.

15 Spring Soup Recipes to Make This Season

From vibrant vegetable-forward soups to globally inspired broths, these recipes prove that soup doesn’t have to disappear once winter ends. Instead, spring soups embrace fresh herbs, lighter textures, and ingredients that feel bright and energizing. Consider this your seasonal inspiration for keeping soup on the menu all spring long.

Bookmark a few favorites below. Many come together quickly, and almost all taste even better the next day.

spring pea gazpacho in bowls

Spring Pea Gazpacho

A chilled pea gazpacho that captures the bright flavors of spring. Sweet peas, fresh herbs, and citrus come together for a refreshing soup that feels light yet satisfying.

big green immunity boosting soup

Big Green Immunity-Boosting Vegetable Soup

Packed with asparagus, broccoli, spinach, and fresh herbs, this vibrant green soup is a celebration of spring vegetables. Soaked cashews add a creamy texture while keeping the recipe dairy-free.

greek lemon chicken soup

Greek Lemon Chicken Soup (Avgolemono)

Bright, citrusy, and comforting, this Greek lemon chicken soup is perfect for spring. Tender chicken, fresh herbs, and a silky lemon broth make every bowl feel both cozy and refreshing.

cauliflower soup

Creamy Cauliflower Soup with Herby Drizzle

This creamy cauliflower soup is simple, velvety, and surprisingly light. Its delicate flavor and silky texture make it a perfect transitional soup for early spring.

easy black bean soup with toppings

Easy Black Bean Soup

This easy black bean soup is hearty, nourishing, and packed with warming spices. It’s the kind of simple, pantry-friendly recipe that works year-round—but still feels fresh enough for spring nights.

one pot moroccan vegetarian stew recipe, easy healthy dinner

One-Pot Vegetable Chickpea Stew

A cozy vegetarian chickpea stew filled with warming spices and plenty of plant-based protein. It’s hearty without feeling heavy, making it perfect for those in-between winter-to-spring days.

Roasted Tomato & White Bean Soup Recipe

Roasted Tomato and White Bean Soup

This tomato white bean soup is rich, comforting, and surprisingly light. Creamy white beans and a bright tomato broth create a balanced soup that feels just right for early spring.

Vegan Coconut Dal with Kale

Vegan Coconut Dal with Kale

This coconut dal is deeply comforting yet vibrant with flavor. Creamy coconut milk and warming spices transform lentils into a nourishing, weeknight-friendly soup.

thai coconut curry soup

Thai Coconut Curry Soup

Loaded with vegetables and simmered in a rich coconut milk broth, this Thai coconut curry soup is vibrant, warming, and deeply satisfying. Red curry paste and fresh aromatics add layers of flavor while keeping the soup nourishing and weeknight-friendly.

turmeric chicken soup

Turmeric Chicken Immunity Soup

Food-as-medicine takes center stage in this turmeric chicken soup, packed with ginger, garlic, and anti-inflammatory turmeric. With tender chicken and soba noodles in a flavorful broth, it’s a comforting bowl that feels especially welcome during allergy season.

chicken tortilla soup with ingredients

Chicken Tortilla Soup

Spices, tender chicken, and a rich tomato-based broth make this chicken tortilla soup a standout. With just about 30 minutes of hands-on time, it’s an easy weeknight dinner that delivers big flavor.

one pot spicy and vegan corn soup with poblano peppers and coconut milk

One-Pot Spicy Vegan Corn Soup

Sweet corn meets a touch of heat in this bright and satisfying vegan corn soup. Made in one pot and packed with flavor, it’s the kind of sunshiney soup that feels perfect for early spring.

vegan butternut squash soup recipe ingredients

Vegan Butternut Squash Soup with Ginger & Coconut Milk

Velvety and deeply flavorful, this butternut squash soup delivers comfort without feeling overly heavy. It’s the perfect reset meal when you’re craving something nourishing yet refreshing.

thai chicken soup

Thai Chicken Soup with Butternut Squash & Bok Choy

A one-pot meal filled with mushrooms, bok choy, squash, and warming spices, this Thai chicken soup is as nourishing as it is flavorful. Chicken drumsticks simmer directly in the broth, creating incredible depth.

coconut curry red lentil soup

Coconut Curry Red Lentil Soup

Plant-based protein meets bold flavor in this coconut curry red lentil soup. Lentils, kale, ginger, and tomatoes simmer together for a hearty bowl that still feels light enough for spring.

This post was last updated on March 16, 2026, to include new insights.

The post 15 Spring Soup Recipes That Feel Light, Fresh, and Cozy appeared first on Camille Styles.

  •  
❌